Canadian Owned |

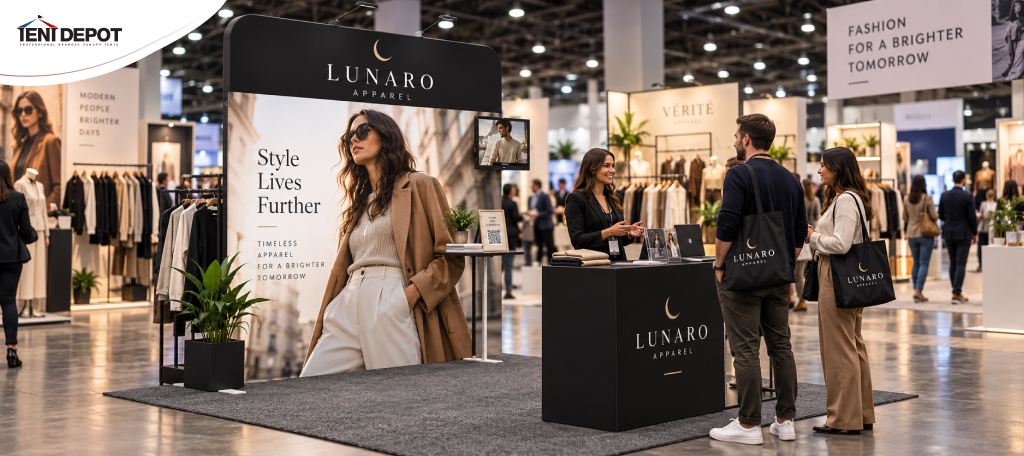
A small trade show booth can feel crowded quickly when you have clothing racks, seasonal collections, accessories, and branding competing for the same space. But a limited exhibition area doesn't mean you have to compromise on how your clothing is presented.
With the right retail clothing trade show booth ideas, even a compact 10×10 space can become an organized, inviting showcase for your brand. The key is to display your strongest pieces where buyers can see them, make collections easy to browse, and leave enough room for conversations.
Whether you're an independent fashion designer exhibiting in Toronto, a clothing retailer introducing a collection in Vancouver, or an apparel wholesaler meeting prospective stockists in Montréal, thoughtful booth planning can help you make better use of every square foot.
Let's explore practical clothing trade show booth ideas, space-saving displays, and layout strategies that work for Canadian fashion exhibitors.
Popular Product

|

|

|
Common Booth Sizes for Canadian Clothing Exhibitors
Your booth size shapes every layout decision, from how many racks fit to where buyers enter. Most Canadian shows sell space in standard footprints, so knowing yours before you plan stops you from buying displays you cannot use.
10×10 ft inline
The usual starting point for independent designers and small retailers. Only the front is open, so the back wall carries the display.
10×20 ft inline
Gives wholesalers room for several lines, size runs or a separate order area.
20×20 ft island
Open on all four sides, so every display must look finished from any angle.
Rules differ between venues in Toronto, Montréal, Vancouver and Calgary. Therefore, it is best to check the exhibitor manual early for height limits, fire-retardant fabric requirements, hanging signage rules and installation labour policies.
Challenges Clothing Exhibitors Face
Clothing is harder to exhibit than most products. Every style comes in several sizes and colours, and garments need room to hang, so a small booth fills up fast. Most exhibitors run into the same few problems.
- Limited space: Showing several sizes and colourways quickly makes a small booth feel packed. So, look upward before adding another clothing rack.
- Poor visibility: Key pieces get missed when they hang behind racks or sit below eye level. It is best to place the top selling or hot clothing products where the eye lands first.
- Crowded displays: Too many garments overwhelm buyers instead of guiding them to your best work. Better to pick the only selected articles or hot sellers only if you have confined space.
- Disconnected elements: Racks, signs and backdrops that do not match make the booth look pieced together. Thus, creating a bad brand impression.
Smart Clothing Display Ideas for Trade Shows
Go Vertical with Wall Systems
Vertical garment displays help you present apparel at different heights without the need of extra floor fixtures.
In a small booth, the back wall is your most valuable surface. Slatwall or freestanding gridwall panels let you swap hooks, faceouts, brackets and shelves without damage. Modular slat strips combine wall mounted hanging rails, faceouts and shelves in one clean, minimal footprint.
For instance, a Canadian streetwear label showcasing oversized shirts, hoodies and jackets could use a rear display wall for its signature piece and a narrow side rack for additional styles.
- Place strongest garments around eye level.
- Use higher shelves for lightweight accessories, and folded items like shirts, pants, ties etc.
Choose Space-Saving Clothing Racks
Clothing racks are essential for fashion trade show displays, but the wrong rack can occupy valuable browsing space. Industrial pipe racks with wooden shelves hold folded shirts on the base and hats or shoes on a top tier. A leaning ladder can drape scarves or light garments, and stacked wooden crates double as modular cube shelving.
For example, a small boutique exhibiting at a Toronto fashion event could use two narrow garment racks against the back and side boundaries, reserving the middle for one mannequin featuring a complete outfit.
Keep enough distance between racks for visitors to remove hangers and examine fabrics without disturbing neighbouring merchandise.
Merchandise Complete Looks
Displaying every clothing sample together may seem efficient, but crowded racks make individual pieces harder to notice.
Instead, divide garments into coordinated groups based on collection, season, style, or intended customer. Because buyers see how pieces sell together, which suits a seasonal capsule.
- Group outfits, not item types.
- Hang a top with its matching bottoms, and place accessories on a platform below.
Wholesale clothing suppliers can apply the same approach by separating product categories or delivery seasons. Organized collection labels make it easier for retailers to find the styles relevant to their stores.
Build a Hero Focal Point
Anchor the main sightline with a standout four-way rack or a themed mannequin vignette that tells your seasonal story. Supporting styles sit behind it. Why? Because visitors walking through a busy exhibition hall may only glance at your booth once before moving on. With this idea in place, you can give them a better reason to stop. And if they stop, you’ve well communicated your brand’s style that created not just a hook but a footprint inside your booth.
As an example, a sustainable fashion label launching a new outerwear collection could place a mannequin in its signature jacket near the front corner, with the remaining colour options displayed along the side wall.
Keep Key Products Visible
Alternate hanging rails with colour-coordinated folded stacks to avoid visual fatigue. Warm spotlights or LED strips highlight bestsellers. Minimal platforms or geometric blocks, borrowed from monochrome window displays, lift featured pieces off the table.
Design a Small Buyer Meeting Area
For clothing wholesalers and emerging fashion labels, business conversations are often just as important as product presentation. If space permits, reserve a small area for a compact table, two chairs, or a counter where visitors can review catalogues and exchange contact details. Or if the booth is too small for searing, use a narrow standing counter table instead.
Bringing Racks, Signage and Backdrops Together
A cohesive booth uses one colour palette and one message. Start with a branded fabric backdrop: it sets the tone and acts as your largest sign. Tent Depot Canada's custom printed backdrops and tension fabric displays fill this role, alongside branded table covers for the order area and retractable banners near the aisle. Racks and mannequins then sit in front of the backdrop instead of competing with it. Budgets vary, so begin with the backdrop and add pieces as your show schedule grows.
Space-Planning Tips
Good booths are planned well before move-in day. These steps help you check your layout against the venue's real conditions, so there are fewer surprises when you arrive.
1. Start with the official floor plan
Ask the show organizer for it, then mark the open sides, columns, power drops and height limit before you sketch anything.
2. Tape it out and walk it
Mark your footprint on the studio floor and walk through it as a buyer would. Tight corners that a drawing hides become obvious.
3. Get approvals in writing
Confirm fire-retardant certificates for fabrics and permission for hanging signage with the show's exhibitor services team before you order.
4. Edit samples by goal
For inquiries, bring size runs of your top styles. For a seasonal launch, bring one complete capsule. For relationships, show fewer pieces and add seating.
5. Rehearse the full setup
If it takes longer than the venue's move-in window, simplify the layout rather than hoping for a faster day.
6. Measure and weigh packed cases
Freight carriers and airlines have size and weight limits, whether you ship across provinces or fly to Vancouver or Calgary.
Common Mistakes to Avoid
Each of these mistakes has a real cost on the show floor. Here is what goes wrong, and how to prevent it.
| Mistake | What it costs you | How to avoid it |
|---|---|---|
| Displaying every SKU at once | Buyers cannot find your best pieces and walk past | Show your strongest styles and let linesheets or QR codes cover the rest |
| Placing a table across the front | It blocks entry, so conversations happen from the aisle or not at all | Move tables to the side or back of the booth |
| Using signage too small to read from the aisle | Visitors do not know who you are until they are already inside | Place your brand name high on the backdrop, sized to read from the aisle |
| Ignoring venue height or fire rules | Displays can be rejected or taken down on move-in day | Check the exhibitor manual when you book, not when you pack |
| Leaving setup to the last hour | A rushed, messy booth when doors open, with loading docks at their busiest | Book a dock slot early and rehearse your setup beforehand |
Final Thoughts
A strong clothing trade show booth is not about having the biggest space. It is about clear choices. Decide whether your goal is inquiries, a seasonal launch or long-term relationships, then give every rack, sign and backdrop a job that supports it.